
First run walkthrough
from install to a first real run.
A plain-language tour in the order you will do it: install, create the owner, set your brand, try a template, read the backtest and the grade, run on paper, then on testnet, and only then decide about mainnet. No code is edited on this page.
01Before you begin
The commands on this page are written for the shell of macOS and Linux (bash or zsh). On Windows, run them in WSL (Windows Subsystem for Linux, Ubuntu) or Git Bash: commands such as cp, openssl, set -a && . ./.env and multi-line curl with \ do not work as written in PowerShell or cmd. The node and pnpm commands work in any of them.
- A computer with Node.js 22.12+ and pnpm (Requirements).
- No accounts and no keys are needed for steps 1 to 7. No money moves until step 9, and only if you switch mainnet on.
- For step 8 (testnet): a browser wallet extension and a Hyperliquid testnet account with test USDC.
A fresh install can paper-trade and use testnet. Real orders are possible only after you turn on Admin → Trading → Mainnet trading, and then only when a user connects their own wallet, confirms the risks and starts a mainnet run. Losses are possible; nothing in THESIS predicts or promises a result.
02Step 1: Install and start
- Open a terminal in the project folderThe
sourcefolder of your download, the one that containspackage.json. - Install, make a secret, start
Keep this terminal open. Save the secret in your password manager: it protects the keys you will store later (Secrets and backups).pnpm install openssl rand -hex 32 # copy the 64-character answer ADMIN_SECRET_KEY=<your-secret> pnpm dev - Check it runsOpen
http://localhost:5180/: the landing page with live Hyperliquid prices.
More detail, and how to run it as a production server: Quick start and Installation.
03Step 2: Create the owner account
- Find the setup codeWith no
ADMIN_SETUP_TOKENset (as in Step 1), it is in the terminal: a block that starts[admin] No owner account yet.followed by a code likeXXXX-XXXX-XXXX-XXXX. Can't see it? Setup code not found. - Open the admin
http://localhost:5180/admin. Enter the code (or the value ofADMIN_SETUP_TOKENif you set one), your email and a password of at least 12 characters, then Create owner and sign in. Nobody can create the owner without one of the two. - Turn on two-factorSecurity & alerts → set up two-factor and keep the recovery codes somewhere safe.
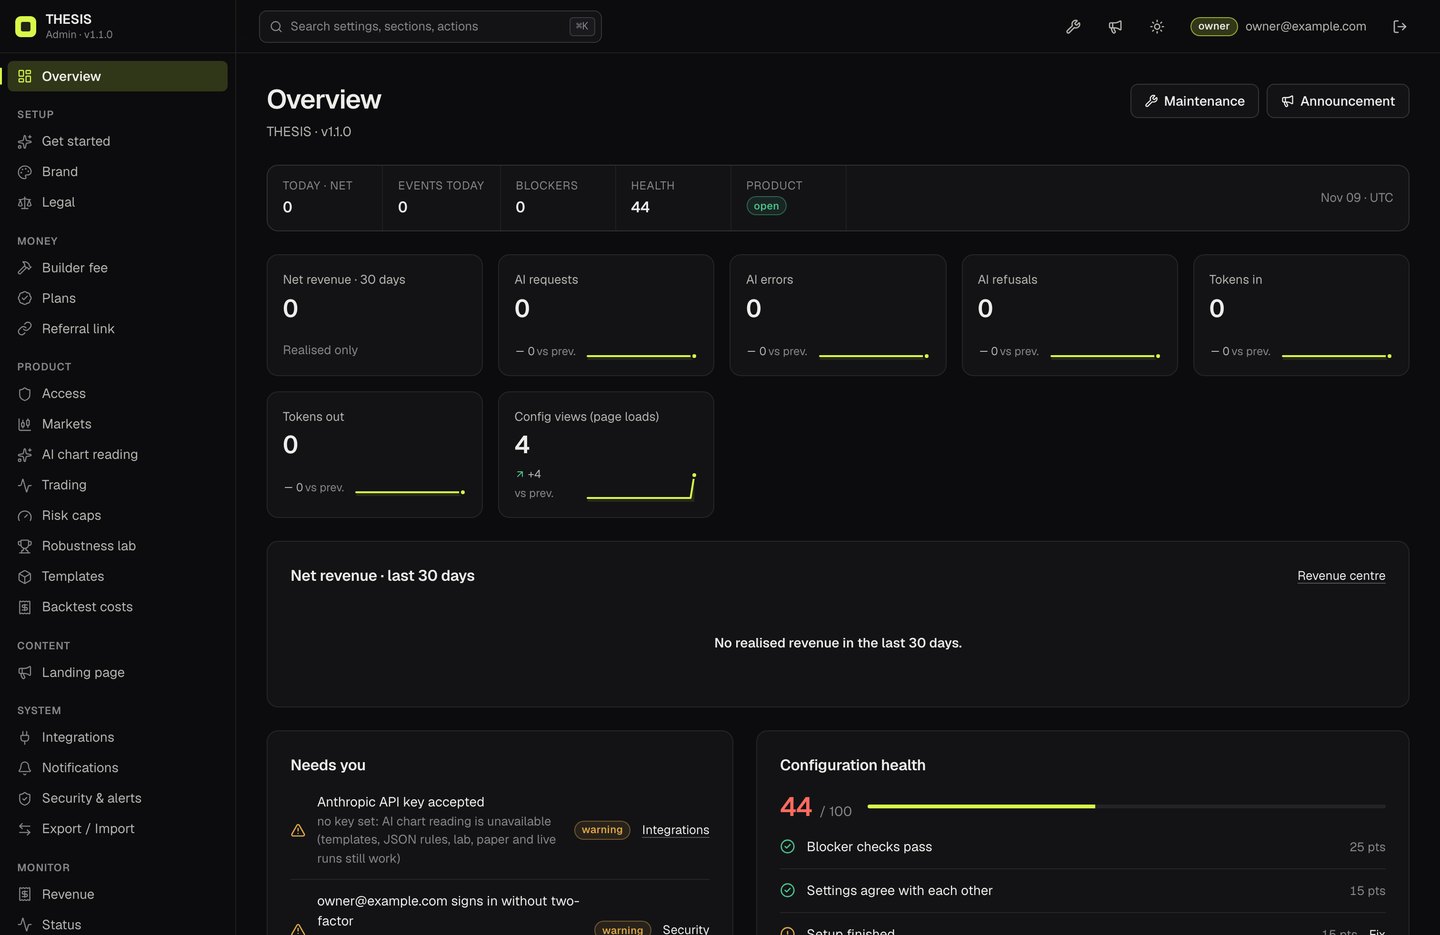
04Step 3: Set your brand
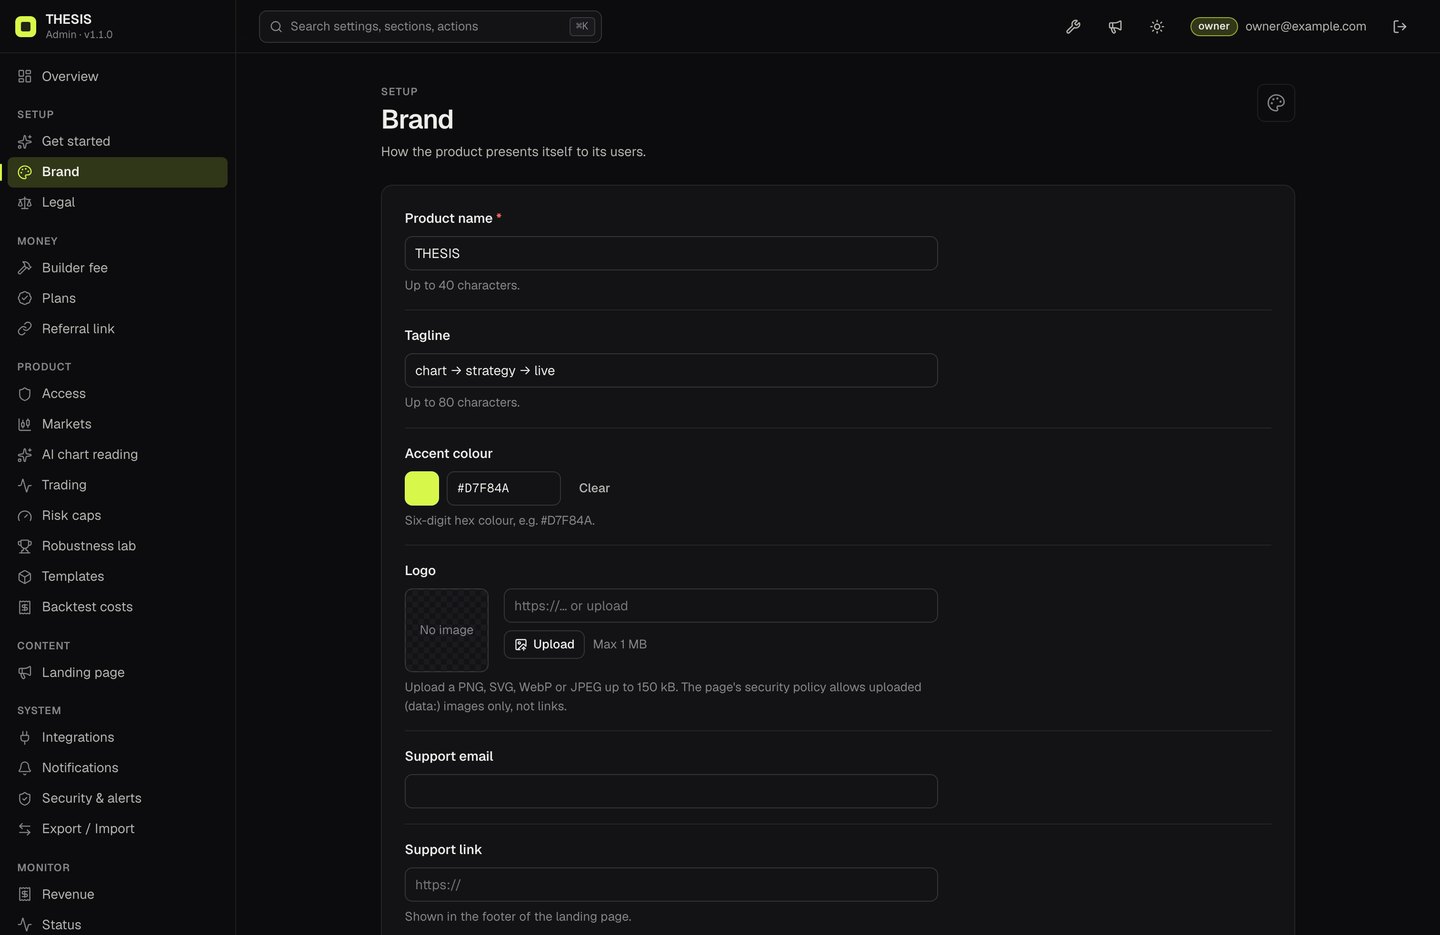
- Get startedThe setup wizard asks for the product name, the accent colour and a support email.
- BrandAdd a tagline and upload your logo (PNG, SVG, WebP or JPEG up to 150 kB; uploads only, not links).
- LegalReplace the default Risk notice (footer) with text your lawyer approves.
- Landing pageHeadline, sub-headline, button label and FAQ.
- CheckReload
http://localhost:5180/and/app: your name, colour and copy are there. No rebuild needed.
What else you can change without code, and what needs a rebuild: Rebranding.
05Step 4: Try a template
- Open the desk
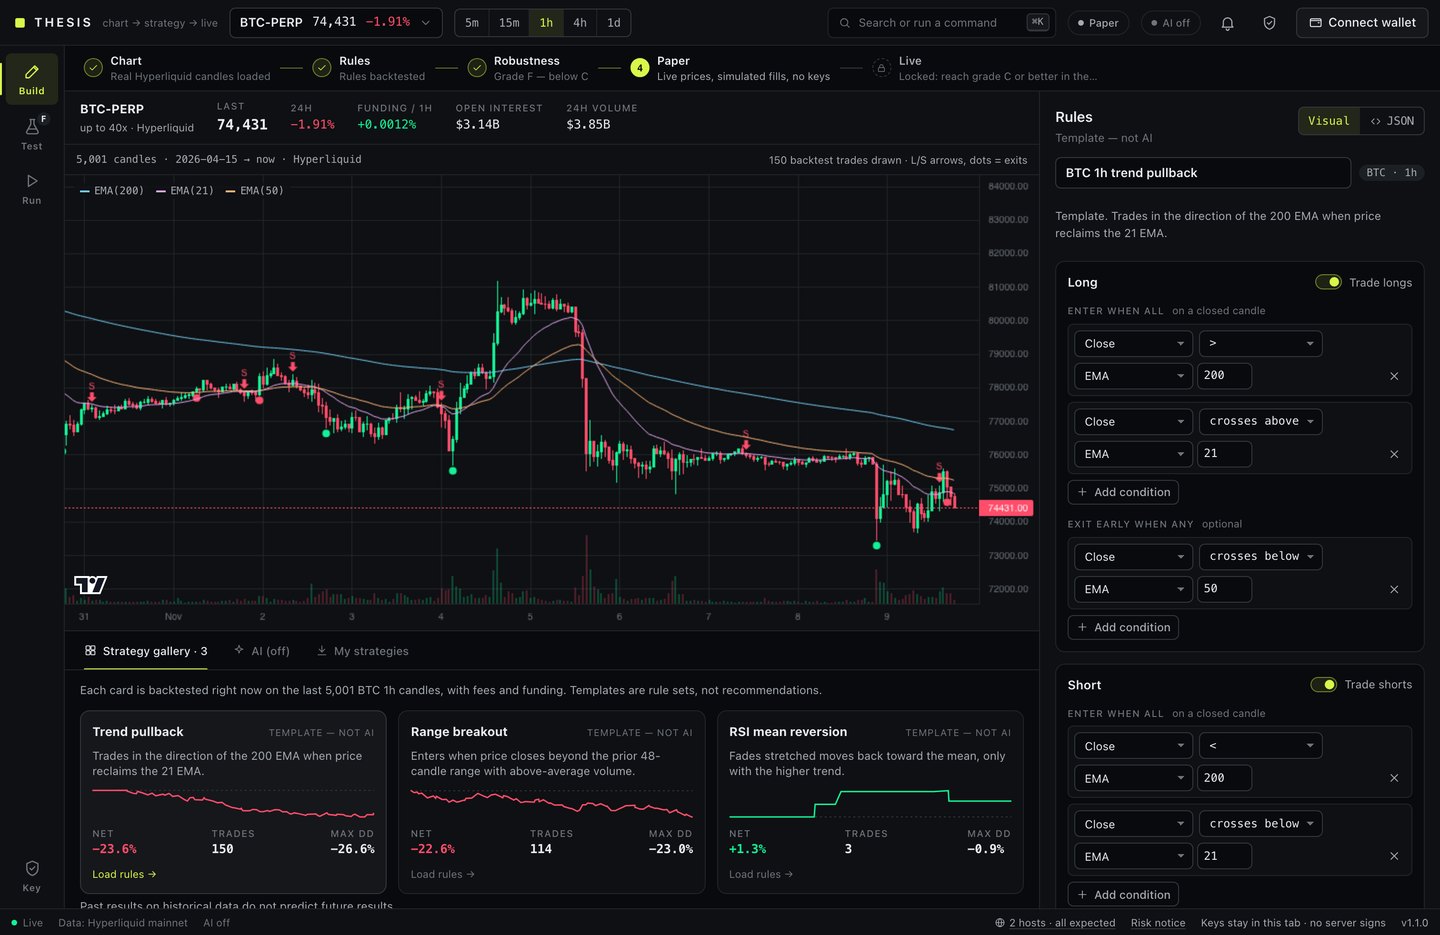
http://localhost:5180/app. It opens in Paper mode in the Build workspace. - Pick a templateIn the strategy gallery, choose one (trend pullback, range breakout or RSI mean reversion; they are labelled Template — not AI) and press Load rules →.
- Look at the rulesThe rules editor shows them as conditions (Visual) or as JSON. Change nothing yet.
06Step 5: Read the backtest
Open the Test workspace. The backtest runs by itself whenever the rules or the market change, on the most recent candles Hyperliquid serves (about 5,000). It charges the taker fee, slippage, real funding and your builder fee if one is on, and shows the older 70 % next to the recent 30 % and next to buy-and-hold.
Read it as history, not as a forecast. A strategy that only looks good in one part of the data is a warning sign.
07Step 6: Get a robustness grade
In Test, the robustness lab runs in the background (press Run lab or Re-run to repeat it). It gives a grade from A to F with plain reasons and a What to try list. Templates often score low: that is the lab doing its job.
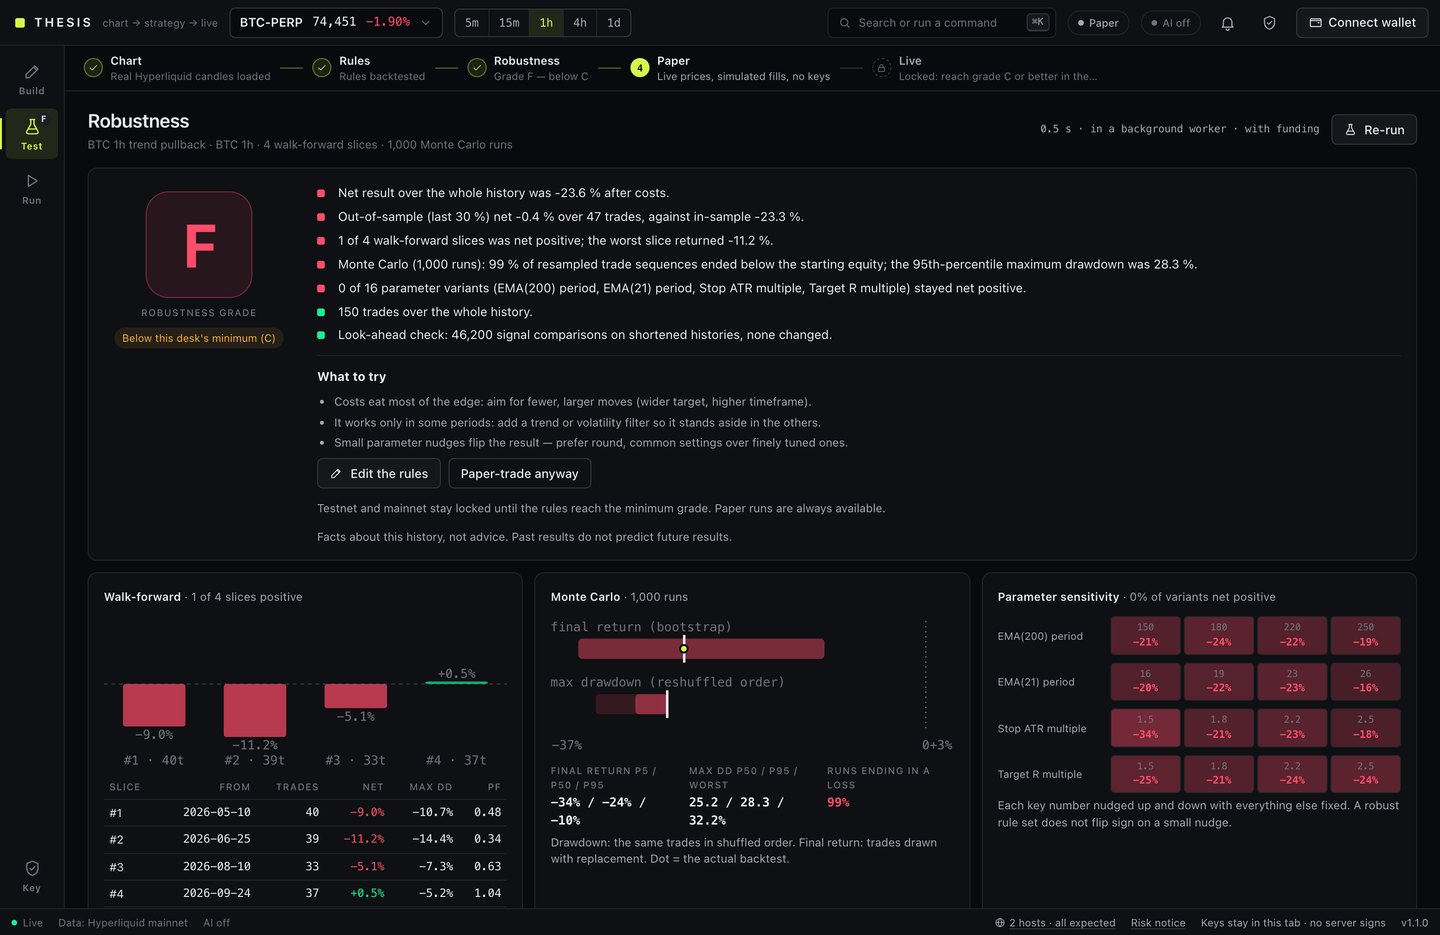
Testnet and mainnet stay locked until the rules reach the minimum grade you set in Admin → Robustness lab (default C). Paper runs are always open.
08Step 7: A paper run
- Open RunMode Paper, then Start paper run. Live prices, simulated fills, no wallet, no keys; the simulated balance is set in Admin → Trading.
- Watch the Run logEvery decision appears there: no entry, signal ignored and why, orders, fills. Rules are checked once per closed candle, so on a 1h chart wait for the next hour.
- Keep the tab openRules run only while the desk tab is open. Kill switch — flatten now stops the run.
09Step 8: Try testnet
Testnet is Hyperliquid's test network with test funds. It is on by default (Admin → Trading → Testnet trading). This is the first time real signed orders go to an exchange, without real money.
- Prepare a testnet accountCreate or fund a Hyperliquid testnet account with test USDC, following Hyperliquid's own documentation.
- Choose TestnetIn Run, switch the mode to Testnet.
- Connect walletYour browser wallet asks to connect.
- Authorise a trading keyThe desk creates a key in this tab and your wallet signs Hyperliquid's approval for it. The key can place and cancel orders and expires after the days set in the admin (default 7); Hyperliquid does not let it withdraw.
- Approve the desk feeOnly if you turned a builder fee on. While testing, you can leave it off (why).
- Acknowledge and startTick the four boxes, then Start on testnet. Each entry is sent with its stop and target, which rest on Hyperliquid.
- Check on the exchangeCompare the Run log and the Journal with your testnet account on Hyperliquid's site. Try Kill switch — flatten now once.
10Step 9: Mainnet, only when you are ready
On mainnet every order uses real funds in the user's own Hyperliquid account, automatically, on each closed candle, for as long as the tab is open. Leveraged perpetual futures can lose a position's whole margin, and losses can be fast. A good backtest or grade describes the past only. Automated execution and fees on trades may be regulated where you or your users are; take legal advice before you offer it to others.
- You ran the same rules on testnet and understood every line of the Run log.
- Admin → Trading → Max notional per order and Risk caps are set to amounts you accept losing.
- Your own risk notice is in Legal; blocked countries are reviewed in Access.
- Switch it onAdmin → Trading → Mainnet trading → on → Save changes. The change is in the audit log.
- Start a runIn the desk, mode Mainnet: connect the wallet, authorise a key for mainnet, tick the four boxes, type the confirmation (for example
BTC LIVE) and press Start live on mainnet. - Switch it off againat any time with the same switch; paper and testnet stay available.
11External accounts: what to do, and how to test meanwhile
Some features depend on an account with another company. Provider screens change, so follow each provider's own documentation for the clicks; this table says what THESIS needs from each and what you can test while you wait.
| For | What you do | Where it goes in THESIS | Test meanwhile |
|---|---|---|---|
| AI chart reading | Create an Anthropic account, set up billing, create an API key. | Integrations → Anthropic API key, then Test connection (owner only). Or ANTHROPIC_API_KEY on the server. | Everything else works without it: templates, JSON rules, backtest, lab, paper and testnet runs. |
| Builder fee | Choose a Hyperliquid address you control and keep at least 100 USDC of perps account value on it. Hyperliquid's rules: Hyperliquid docs → Builder codes. | Builder fee: address, fee in tenths of a bp (cap 0.1 %), switch on. Status checks the 100 USDC. Each user approves the maximum fee once in their wallet (Approve the desk fee) before a live run. | Leave it off; paper and testnet runs work. Backtests include the fee once it is set. |
| Referral link | Get your own referral code from your Hyperliquid account: connect your wallet at app.hyperliquid.xyz/referrals and create a code (labels as of October 2026). Hyperliquid's rules for codes and links: Hyperliquid docs → Referrals. | Referral link: the link in the form https://app.hyperliquid.xyz/join/CODE, the disclosure, then Show the referral link. | Off by default; nothing depends on it. |
| Pro plan | A Hyperliquid address you control that receives USDC. | Plans: pay-to address, price, period, switch on (details). | Off by default. Plans need an Anthropic key to be useful. |
| Telegram alerts (each user) | Each user creates their own bot with @BotFather (/newbot), copies the token, sends a message to the bot and finds their chat id; the desk's alert panel explains how. | In the desk, alerts panel: token and chat id, Send test message. Stays in the user's browser. | In-app alerts and browser notifications need nothing. |
| Hosting on Vercel | A Vercel project from your Git repository and a Postgres database (for example Neon). | Environment variables ADMIN_SECRET_KEY, DATABASE_URL, optional ANTHROPIC_API_KEY (Deployment). | Run everything locally with pnpm dev, or on a Node server with SQLite. |
Who pays for each: Costs and services. THESIS ships with no builder address, no referral code and no keys of its own; all of them are empty until you fill them.